
Steps in Creating a Web Site
1. With client, determine the scope and content
- Purpose and goal of the site
- Features needed on the site
- Discuss design
- Get any photos and logos the client wants to use
- Establish a contact to provide content
- Determine whether the content needs to be rewritten (usually it does)
- Determine whether new content needs to be created and determine who will do this.
2. Keywords
- Create a list of keywords
- Use the keywords in
- Page titles <title> tag
- Meta tags - description, keywords
- H1 (only one h1 per page)
- H2-h6
- Copy (text on the page)
- File names
- Navigation links
- Usage
- Select words or phrases people would most likely search on
- Use a minimum one per page; maximum 15-20 per page
- Can repeat keywords on other pages
Keyword generators
3. Basic layout of your Web pages
- Determine what the basic layout of the Web page (header, navigation style, content, sidebars, footer)
- Determine the width of your pages w3schools.com
- Decide on the number of pages
- Decide on the page name (giving you the name for the site navigation link)
- Color scheme
4. Determine the color scheme
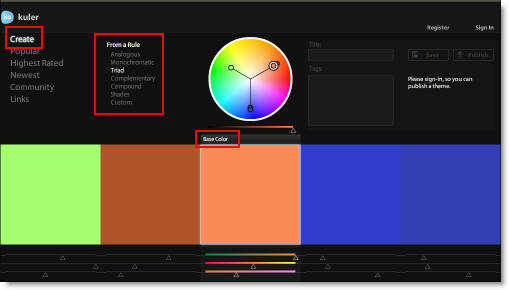
Use a logo or a photo and let kuler create a color scheme for you based on the colors in the image. Use the color scheme generator to hone in on color scheme.
- Kuler kuler.adobe.com
- Create your own scheme
- Use ones already created
- Create a color scheme from an image
- Download the color scheme
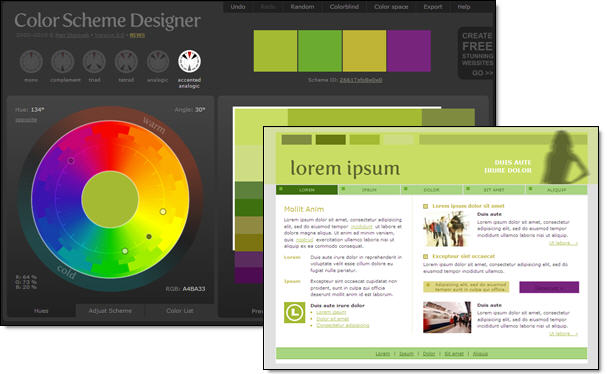
- Color Scheme Designer http://colorschemedesigner.com/
It has a sophisticated user interface; it also shows color schemes as seen by people who are color blind. You are able to see the color scheme applied to a mock web page.
- Color Combos http://www.colorcombos.com/
- Has a color grabber that grabs colors from a web site
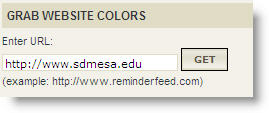

- Has a color grabber that grabs colors from a web site
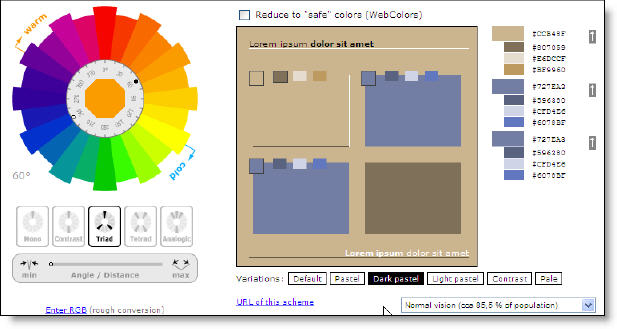
- Palette from a Color Wheel http://wellstyled.com/tools/colorscheme2/index-en.html
- Allows you to try out many color combinations
- Shows how colors look to people who are color blind
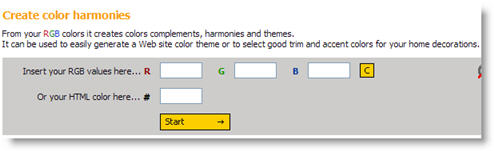
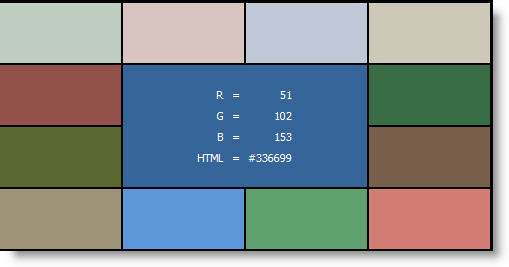
- Easy RBG http://www.easyrgb.com/index.php?X=HARM
- Builds harmonies of a base color you supply
- Site also has a lot of information on color for decorating and printing
- Firefox Add-ons
5. Choosing your fonts
Until now you had to use fonts on your webpage that resided on the viewers computer. Now, you can add a CSS link to fonts that reside on the Internet. Read more.
Here are a couple of links to information and code to link your pages to fonts on the Internet.
- http://code.google.com/apis/webfonts/docs/getting_started.html
- http://www.alistapart.com/articles/cssatten
6. Root folder
Create your root folder and create an assets folder inside.
- All files need to be inside your root folder.
- html files
- image files
- CSS files
- media files such as video, audio, Flash, etc.
- The root folder will be uploaded to the Web hosting server to make your site available on the Web.
7. Define your site in Dreamweaver
DO NOT SKIP THIS STEP!
- Video tutorial- Define your site in Dreamweaver 6 megs 2 minutes (optional)
- Closed captioned versions
- 800x600 Define your site in Dreamweaver
- 640x480 Define your site in Dreamweaver
- Closed captioned versions
- Open Dreamweaver
- Define your site SITE>NEW SITE command
- Link to your root folder
- Link to your assets folder, which needs to be inside the root folder
Reason for this step: Dreamweaver needs to be able to keep track of all your links to images and other pages so if you change the name of a folder or file or move a file or folder, Dreamweaver is able to update all the links for you. If you do not do this step, Dreamweaver may not be able to update all your links. Dreamweaver will not be able to manage templates and library items.
8. Gather your content
- Gather your images and put them in the assets folder.
- Create any multimedia files.
- Video tutorial on creating a slideshow 3.5 megs 4:01 minutes (optional)
- Closed captioned versions
- 800x600 creating a slideshow
- 640x480 creating a slideshow
- Write the text for each page. It is better not to use Word as Word creates its own html, which can take time to remove.
9. File and folders name correctly
Make sure all your folders and files have proper names.- No spaces or illegal characters in your folder or file names
- All files need to have extensions .html, .jpg, .gif, etc.
- Meaningful and easy to remember names for your files and folder
- If you have images from a digital camera, rename them; do not use the default file name from the camera, which is usually a series of number
10. Create a basic page - name it basicpage.html
Create a new Web page and name it basicpage.html. You will use this basic page to create a template. Use the template to generate all your webpages.
- Video tutorial - Create a basic page 3.5 megs 1:10 minutes (Optional)
- Closed captioned versions
- 800x600 create a basic page
- 640x480 create a basic page
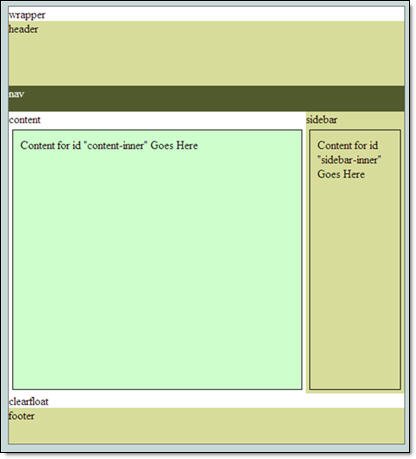
11. Layout using divs, css, floats and clears
In this step, you will create the layout, the framework of the page. You will add divs and CSS to align, float, and clear the divs as needed.
- Video tutorial - layout 35 megs 9:06 minutes (Optional)
- Closed captioned versions
- Layout with html divs and CSS code
- Closed captioned versions
- wrapper div (#wrapper for the CSS rule)
- This div will encase all the other divs
- To center this, use margin-left:auto; and margin-right: auto;
- header div (#header for the CSS rule)
- This div is inside the wrapper div
- Often a background color or background image is added
- You may need to give this div a height
- nav div (#nav for the CSS rule)
- This div is inside the wrapper div and below the header div
- Often you give this div a height - the height of your navigation list, spry navigation, or other navigation elements
- content div (#content for the CSS rule)
- This div is inside the wrapper div and below the nav div
- Float this div left
- Add a width (like 75% for example)
- content-inner div (#content-inner for the CSS rule)
- This div needs to be inside the content div
- Add margin, border, and padding to this div
- sidebar div (#sidebar for the CSS rule)
- This div needs to be inside the wrapper and below (outside) the content div
- Float this div right
- Add a width (like 25%, for example)
- sidebar-inner div (#sidebar-inner for the CSS rule)
- This div needs to be inside the sidebar div
- Add margin, border, and padding to this div
- clearfloat div (.clearfloat for the CSS rule)
- This div needs to be inside the wrapper div and below (outside) the sidebar div
- Add a class. clearfloat clear:both;
- This will force the following content to be positioned below the content and the sidebar divs
- footer div(#footer for the CSS rule)
- footer-inner (#footer-inner for the CSS rule)
- Add margin, border, and padding to this div
- Insert the auto update date INSERT>DATE
12. Add navigation
- Add navigation to the nav div using
- Spry menu
- Accessify list-o-matic
- Video tutorial - list-o-matic navigation menu 19 megs (Optional)
- Closed captioned versions
- 800x600 list-o-matic navigation menu
- 640x480 list-o-matic_navigation menu
- Video tutorial - formatting the nav menu 10 megs (Optional)
- Closed captioned versions
- 800x600 Formatting the nav menu
- 640x480 Formatting the nav menu
- Video Tutorial - navigation with sub-menus using absolute and relative divs 7 megs (Optional)
- Lists - including embedded list
- Anchors
- Images
Remember that you can add background images to the a:link and a:hover to make navigation look like rollover images.
13. CSS rules to format content
Add CSS rules to format your content.
Here is a list of commonly formatted tags.
- * {margin: 0; padding:0} This will zero out all margins, giving you more control over your formatting
- body
- font family
- base font size (usually 1em or .9em)
- background-color
- h1-h6 headings
- p tag
- ordered list
- unordered list
- list item
- a:link, a:hover
Remember to target specific regions on your page to have different formatting by section. For example #footer p
14. Create a Dreamweaver template from the basicpage.html
- Select the area you want to be able to add new content on pages generated by the template
- INSERT>TEMPLATE OBJECTS>EDITABLE REGION
- Save the file as a template FILE>SAVE AS TEMPLATE
- If you are asked to update links, select YES
Notice these changes:
- The file name is now basicpage.dwt (Dreamweaver template)
- There is a folder named Template inside your root folder with a file named basicpage.dwt - use the template to make changes to all the pages created from the template
15. index.html page from the basicpage.dwt template
The index page is your homepage.
- It MUST be named index.html
- It MUST be at the root level
If you do not follow these rules, you will be sorry. The browser will not know which file you want to be your homepage and will give the user a warning message.
16. Create the rest of the pages from the basicpage.dwt template
To create the pages of your site using the template:
- FILE >NEW
- On the New Document dialog box, choose
- NEW FROM TEMPLATE
- Select the template (you may have multiple templates)
- Make sure the "Update page when template changes" is checked
- Click on the Create button
17. Upload your Website to a hosting service
- Get a hosting service.
- SITE>MANAGE SITE click on your Website name
- Fill out the Site Definition dialog box. (Call your hosting service's tech support if you need help.)
